

Views: 0 Author: Site Editor Publish Time: 2026-05-22 Origin: Site


An Aluminum Fishing Boat provides extreme durability for serious anglers. You get superior impact resistance compared to traditional fiberglass options. They bounce off rocky shores and navigate shallow hazards effortlessly. Yet, this physical toughness hides a demanding chemical reality. Aluminum remains a highly reactive metal in aquatic environments. Without a strict maintenance protocol, you will inevitably face galvanic corrosion. Neglect quickly leads to oxidized dullness, weak joints, and systemic hardware failure. This guide serves as your comprehensive risk-mitigation framework. We designed these steps to protect your vessel's operational safety. They also preserve its aesthetic lifespan and future resale value. You will learn exact chemical maintenance strategies. We explore deep cleaning protocols, hidden system safeguards, and engine workflows. Master these routines to keep your boat structurally sound and looking pristine on every trip.
Corrosion is chemical, not just physical: Saltwater combined with dissimilar metals (like copper or steel) accelerates galvanic corrosion; maintaining a bone-dry hull is non-negotiable.
Thermal dynamics matter: Cleaning aluminum in direct sunlight reduces chemical efficacy and bakes on residue; always wash in shaded or controlled environments.
Hidden systems degrade first: Transom wells, livewells, and bilges trap moisture. Utilizing compressed air and maintaining physical air gaps around fuel tanks prevents hidden rot.
Winterization requires absolutes: Fuel systems must be either 100% full or completely empty to prevent condensation; plumbing must be entirely purged to avoid freeze-cracking.
Understanding your hull material remains your first line of defense. Aluminum possesses a unique natural defense mechanism. When exposed to air, it immediately forms a dense oxidized layer. This microscopic barrier prevents deeper environmental degradation. However, this same protective layer causes a problem. It creates the dull, chalky appearance common on older boats. If you leave it unmanaged, the metal loses its factory finish entirely. You must actively maintain this layer to balance protection and aesthetics.
Galvanic corrosion represents a far more aggressive threat. Saltwater acts as a highly conductive electrolyte. When your Aluminum Fishing Boat interacts with dissimilar metals, rapid structural degradation occurs. Common culprits include stainless steel fasteners, bronze fittings, or stray copper wiring. The less noble metal always sacrifices itself. In marine environments, aluminum usually acts as the sacrificial anode. It rapidly dissolves when an electrical current flows through the saltwater between these mixed metals. This silent process weakens hull integrity and destroys structural rivets.
You must implement aggressive prevention tactics to stop this chemical reaction. First, mandate the use of freshwater high-pressure flushing. Do this immediately after every saltwater exposure. You must remove the electrolyte to stop the galvanic circuit. Second, require specific boat storage angles. Elevate the bow significantly. Remove all drain plugs. Keep the outboard motor in the down position. These actions ensure zero standing water remains in the bilge or transom well. Finally, consider your mooring situation. Do you permanently moor your vessel in harsh saltwater environments? We highly recommend applying a marine-grade bottom paint up to the waterline. Use an aluminum-safe, copper-free antifouling formula to block direct electrolyte contact.
| Environment | Metal Interaction | Risk Level | Required Action |
|---|---|---|---|
| Freshwater | Aluminum + Aluminum Fasteners | Low | Routine cleaning and dry storage |
| Brackish Water | Aluminum + Stainless Steel Hardware | Moderate | Thorough freshwater rinse, sacrificial anodes |
| Saltwater | Aluminum + Copper/Bronze Fittings | Severe | Isolate metals, copper-free bottom paint, daily flushing |
You cannot simply spray soap onto a dirty hull. Applying cleaning agents directly to dry, dirty aluminum creates an abrasive slurry. This mixture acts like liquid sandpaper. It scratches the surface and embeds micro-contaminants into the pores. Sweeping or blowing off loose dust, grease, and debris remains a mandatory first step. Use a soft-bristle marine brush or a compressed air blower. Remove all particulate matter before you introduce water.
Thermal considerations critically impact your cleaning success. We strongly advise against cleaning hot aluminum. The metal absorbs heat rapidly under direct sunlight. When you apply liquid cleaners to a hot hull, they flash-evaporate. This rapid drying leaves permanent chemical stains and baked-on mineral deposits. These stains prove incredibly difficult to reverse. Always recommend shaded washing environments. If shade remains unavailable, pre-cool the hull. Drape wet tarps over the metal or continuously run cold water over the surface before applying chemicals.
Selecting the right chemical agents protects the protective coatings. Avoid alkaline household detergents like dish soap. They aggressively strip marine wax and leave the raw metal completely unprotected. Instead, choose dedicated marine products.
Oxidation Removal: Recommend dedicated, low-micron aluminum cleaners. They effectively remove oxidation and hard water spots without gouging the metal. This proves especially critical for maintaining unpainted Jon boats.
The Washing Workflow: Wash the hull using a 50/50 water and white vinegar mix or a dedicated pH-balanced marine soap.
The Rinse: Rinse the surface thoroughly with generous amounts of fresh water to ensure no acid residue remains.
The Sealant: Apply an aluminum-specific polish or a high-quality marine wax. This final step seals the metal pores from airborne pollutants and salt spray.
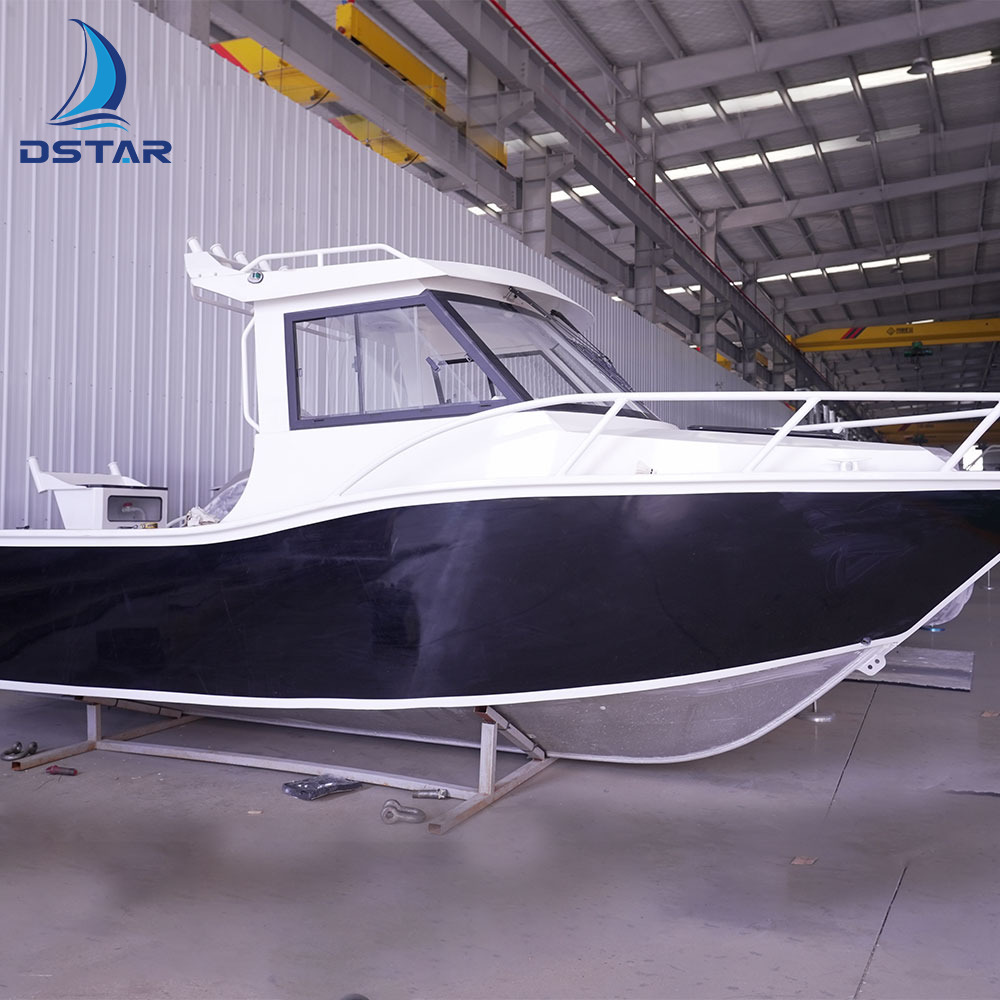
Internal systems often fail silently. Fuel tank corrosion represents a major failure point in an Aluminum Fishing Boat. Many owners flush-mount their tanks directly to the hull floor. This traps bilge water underneath through capillary action. We stipulate that aluminum tanks must sit at least 1/4-inch off the hull floor. This gap ensures adequate airflow to keep the metal bone-dry. You must support the tank with non-reactive materials. Use neoprene strips, high-density plastic, or Teflon spacers. Completely avoid water-absorbing materials like wood or standard foam, which hold moisture against the metal indefinitely.
Livewell and washdown pump maintenance requires equal vigilance. Complex plumbing runs inherently trap water. This hidden moisture creates two severe problems. First, it breeds mold and foul odors. Second, trapped water freezes during winter storage. Detail the procedure of disconnecting all intake and discharge hoses. Use a compressed air line to blow out all lingering moisture from the plumbing. This simple step prevents devastating winter freeze-cracks. It also stops pump rotor lock-up caused by internal corrosion.
Electrical system integrity directly impacts vessel safety. Hull vibrations cause constant friction on wiring. We suggest using a digital multimeter for accurate battery health tracking. Do not rely solely on dashboard gauges. Incorporate routine visual inspections into your workflow. Wire-brush the battery terminals to remove white acidic buildup. Inspect all wire jackets for chafe marks. Address any exposed copper immediately. Exposed wiring in a wet, aluminum environment creates a perfect storm for stray current corrosion.
Engine care functions best as a rigorous two-part cycle. Frame your engine maintenance around pre-launch and post-trip inspections. Catching small issues on land prevents dangerous failures on the water.
Pre-trip Inspection: Verify the engine mounting bolt torque. Hull vibrations slowly loosen these critical fasteners over time. Check the water intake grates for weeds, plastic bags, or debris. Inspect the propeller shaft closely for fishing line tangles and seal leaks.
Post-trip Flushing: Flush the outboard motor with fresh water every single time. Connect a set of flushing muffs. Run the engine to purge sand, salt, and silt from the internal cooling galleys.
Moving parts and trailer synergy complete the physical maintenance boundary. Inside the boat, focus on the hardware. Outline the necessity of vacuuming out seat tracks. Sand and grit destroy the sliding mechanisms. Apply a high-quality marine lubricant to zippers, hinges, and all moving metal hardware. This repels water and prevents seizing.
Extend the maintenance boundary to the trailer itself. You submerge the trailer during every launch and retrieval. Inspect the wheel bearings regularly. Repack them with marine grease to prevent water intrusion. Check the leaf springs for heavy rust scaling. Test the braking systems, as saltwater quickly degrades unprotected drum or disc brake components. A perfectly maintained boat means nothing if the trailer fails at highway speeds.
Consistency outperforms occasional deep cleaning. Establishing a Standard Operating Procedure (SOP) takes the guesswork out of vessel care. We break this down into actionable timelines.
After every single outing, you must act quickly. Perform a thorough freshwater rinse of the entire hull and deck. Drain all plugs to evacuate bilge water. Wipe down all vinyl seating with a damp cloth to remove corrosive salt crystals and sunscreen residue. Finally, take a sponge and manually dry the transom well. Do not leave pooling water anywhere.
Conduct a bi-weekly or monthly review depending on usage frequency. Deep clean the deck using a mild marine soap. Open all storage compartments and inspect them for early signs of mold. Remove any hard water spots using your low-micron cleaner. Check your battery connections for tightness and corrosion. Spray terminal blocks with a moisture-displacing dielectric spray.
Your seasonal overhaul dictates your vessel's lifespan. Winterization demands absolute perfection. First, address the fuel strategy. Add a marine-grade fuel stabilizer to the tank. You must then choose one of two absolutes: either completely fill the tank, or completely drain it. Filling it displaces all air, preventing condensation. Draining it removes the moisture risk entirely. Never leave a tank half-full over winter. Next, conduct a full hull inspection. Scrape any barnacles or marine growth from the bottom. Finally, handle battery storage safely. Remove the batteries from the vessel entirely. Neutralize any acid or electrolyte spills in the battery tray using a baking soda and water solution. Store the batteries indoors in a dry, climate-controlled environment on a wooden or plastic shelf.
| Frequency | Core Tasks | Tools Required |
|---|---|---|
| Post-Outing | Freshwater rinse, drain plugs, sponge dry transom, wipe vinyl. | Hose, sponge, microfiber towels. |
| Bi-Weekly/Monthly | Deep clean deck, inspect storage for mold, remove water spots, check batteries. | Mild soap, low-micron cleaner, dielectric spray, multimeter. |
| Seasonal (Winter) | Stabilize fuel (100% or 0%), scrape hull, purge plumbing, store batteries indoors. | Fuel stabilizer, compressed air, baking soda, plastic scraper. |
Maintaining an aluminum fishing vessel remains an exercise in strict consistency and preventative action. You must proactively manage the chemical realities of the metal. Utilizing the right cleaning agents preserves the protective oxide layer without causing abrasion. Respecting the physical limits of the material means avoiding extreme heat during cleaning and preventing dissimilar metal contact. By strictly adhering to a seasonal Standard Operating Procedure, you dramatically lower the risk of unexpected structural repairs. A dry, well-maintained hull and a fully flushed engine directly translate to a safer, more reliable vessel for years to come.
A: No. Regular household dish soap contains alkaline degreasers. These harsh chemicals strip away protective marine waxes and sealants. This leaves the highly reactive aluminum metal completely unprotected against oxygen and saltwater, accelerating oxidation and dullness.
A: Use a dedicated low-micron spot remover designed specifically for bare aluminum. Alternatively, you can apply a 50/50 mixture of white vinegar and water. The mild acid breaks down calcium and mineral deposits safely. Always rinse the area thoroughly with fresh water afterward.
A: Flush-mounted fuel tanks trap bilge water underneath them through capillary action. Without an air gap, this trapped moisture sits against the metal constantly. This accelerates galvanic corrosion and leads to dangerous fuel leaks. A 1/4-inch gap ensures vital airflow.
A: You only need bottom paint if you permanently moor the vessel in saltwater or brackish environments for extended periods. If you primarily trailer the boat and use it in freshwater, bottom painting remains optional but highly recommended for an extra layer of protection.


